
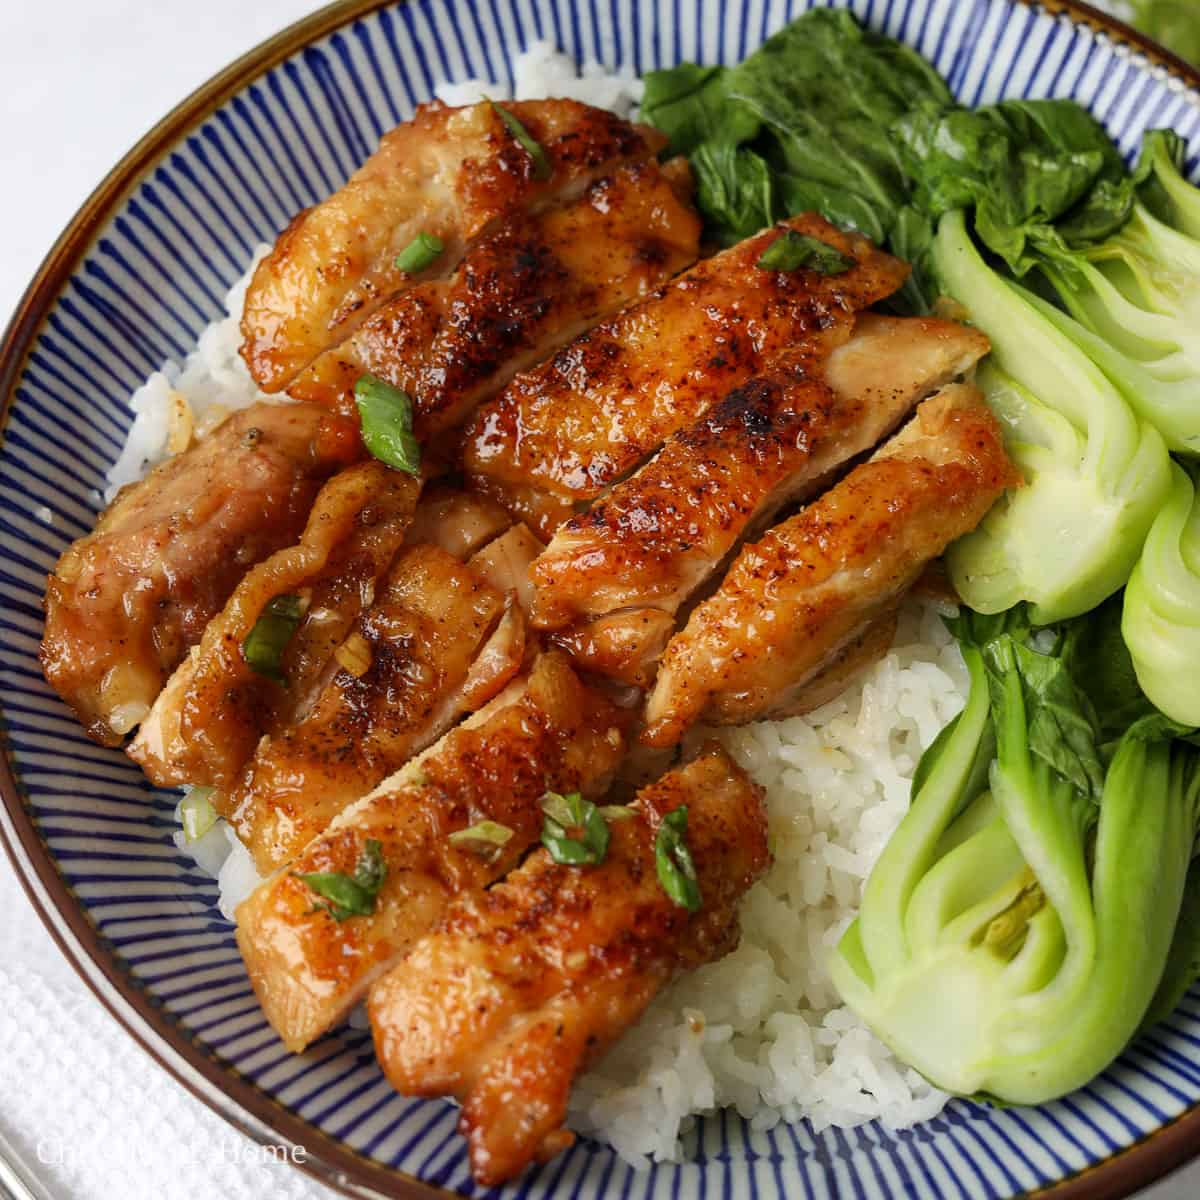
Are you in need of a quick and delightful dinner that the whole family will rave about? Look no further! This easy 20-minute honey garlic chicken proves to be a perfect one-pan dish that checks all the boxes. Featuring tender, juicy chicken thighs coated in a sweet, sticky honey garlic sauce, it’s a simple yet flavorful addition to your weeknight meal rotation. In just 20 minutes, you can whip up a dish that’s not only delicious but also budget-friendly and family-approved.
The great thing about this dish is its versatility. While it’s based on classic American cuisine with Asian influences, it’s adaptable enough to cater to different tastes and dietary preferences. This honey garlic chicken pairs wonderfully with steamed rice, fried rice, or fresh vegetables for a complete meal that pleases every palate.
Whether you’re cooking for a busy family or just a cozy dinner for two, this recipe comes through with no fuss—just straightforward cooking and fantastic flavors!
Why You’ll Love This Recipe
This recipe stands out for several reasons. Firstly, it’s incredibly quick, taking only 20 minutes from prep to table. The use of chicken thighs ensures moist, flavorful meat, and the honey garlic sauce adds a delightful sweet-savory kick that enhances the dish. Furthermore, this meal requires minimal ingredients, which means you likely already have most of them at home!
Additionally, it’s a one-pan wonder, eliminating the mess of multiple pots and pans. And for busy weeknights when time is of the essence, there’s nothing better than a quick, satisfying, and wholesome meal that can be whipped up in no time. Plus, it’s bound to become a family favorite!
Ingredients and Substitutions
Here’s a breakdown of the essential ingredients for this dish along with some possible substitutions:
- Chicken Thighs: Use 4 skin-on bone-in chicken thighs for the best flavor. If preferred, skinless, boneless thighs can also be used.
- Vegetable Oil: A neutral oil, like canola or sunflower oil, is ideal for frying. Avoid using olive oil as it has a lower smoke point.
- Seasonings: Salt, black pepper, and garlic powder are necessary for seasoning the chicken. Fresh garlic is used in the sauce for an aromatic touch, enhancing the overall flavor.
- Honey: This gives the dish its characteristic sweetness. Light corn syrup can be substituted if honey is unavailable.
- Vinegar: Use rice vinegar for a mild flavor, but apple cider vinegar or white vinegar works too.
- Soy Sauce: Regular soy sauce is used, but feel free to opt for low-sodium varieties for a healthier option.
- Sesame Oil: Toasted sesame oil adds depth to the sauce; however, it can be omitted if necessary.
- Cornstarch: This is used for thickening the sauce; substitutes such as potato or tapioca starch can also work.
How to Make Easy 20-Minute Honey Garlic Chicken
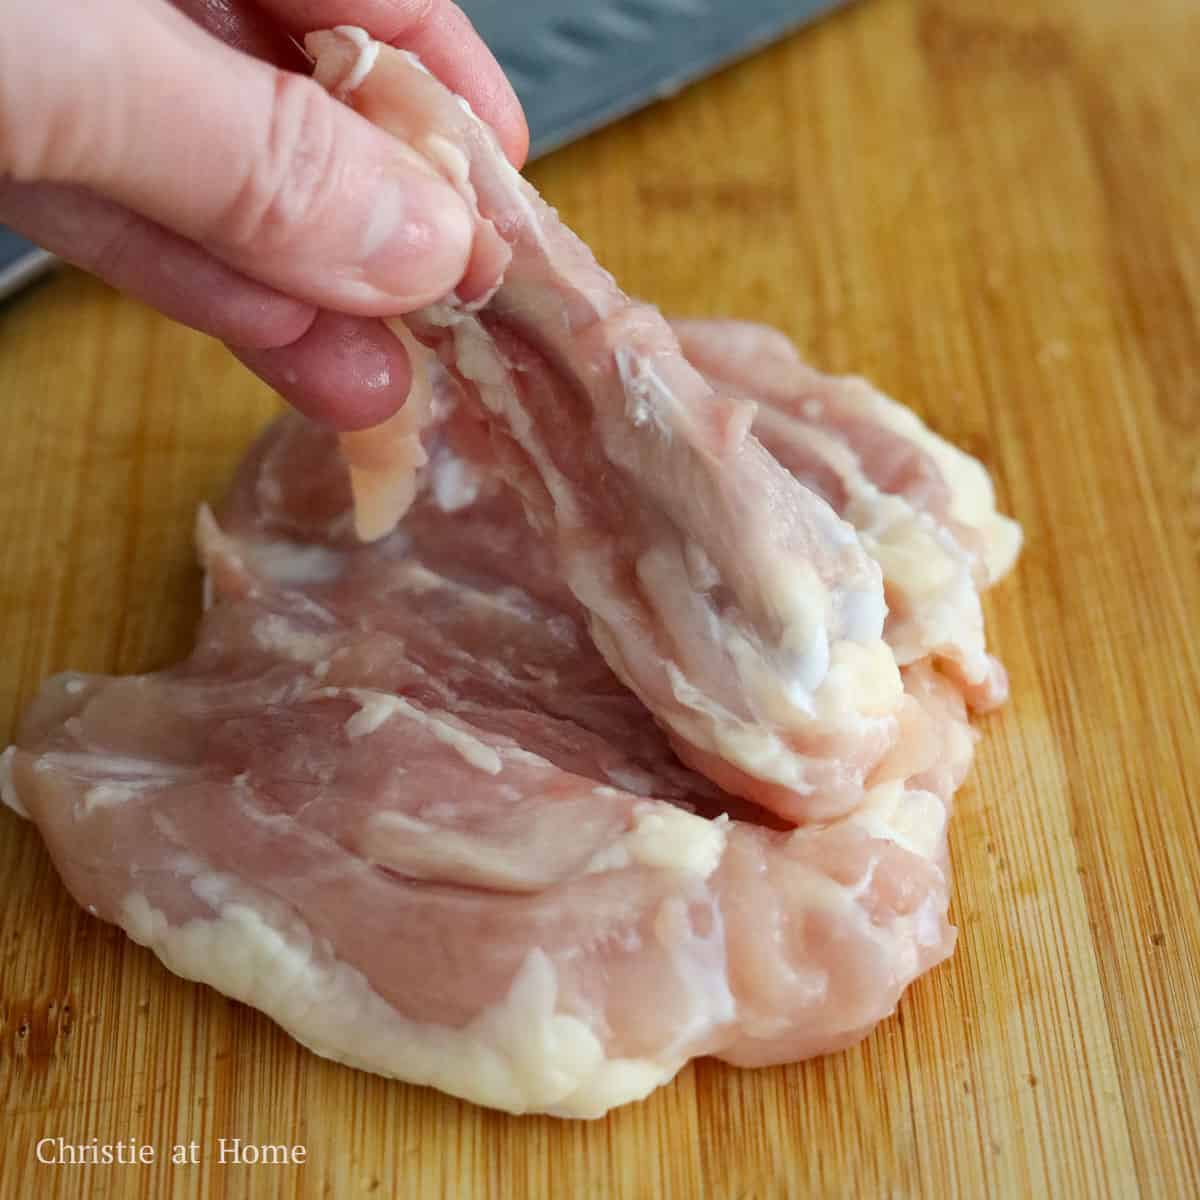
- Start by deboning the chicken thighs. Place them bone-side up on a cutting board and make small slits around the bone using a sharp knife until it can be easily removed.
- Pat the chicken dry on both sides with paper towels to eliminate any excess moisture, promoting better browning during cooking.
- Season the chicken thighs generously with salt, black pepper, and garlic powder on both sides and set them aside.
- In a small bowl, combine all the honey garlic sauce ingredients, ensuring the honey dissolves completely after mixing.
- Heat vegetable oil in a large pan on medium heat. Once hot, add the chicken thighs skin-side down and cook for approximately 4-5 minutes until the skin is golden brown. Flip the chicken and cook for another 2 minutes until the meat reaches an internal temperature of 165°F.
- Reduce heat to low-medium and carefully pour the prepared sauce around the chicken thighs, allowing it to thicken. Flip the chicken after 15 seconds, letting the skin side absorb some sauce, then flip it again for even coating.
- Once the chicken is fully cooked and coated in sauce, garnish with chopped green onions if desired and serve.
Expert Tips for Success
- Always ensure your chicken is fresh for the best flavor; check for a clean scent when purchasing.
- Be careful when deboning; use a small knife for precision without cutting through too much skin.
- Patting the chicken dry not only helps in browning but also prevents steaming during cooking.
- Keep an eye on sauce thickness to avoid burning; if it thickens too much, remove the chicken and simmer it separately.
Variations
There are several ways to adapt this honey garlic chicken to suit your tastes:
- Spicy Version: For a kick, mix in red pepper flakes into the honey garlic sauce for some heat.
- Air Frying: This dish can also be made in the air fryer. Simply season the chicken thighs, arrange in a single layer in the air fryer basket, and cook until they reach the desired internal temperature.
- Gluten-Free: Substitute the soy sauce with tamari sauce or coconut aminos to make it gluten-free.
Serving Suggestions
This honey garlic chicken shines when served over a bed of fluffy white rice or paired with fried rice. It also goes wonderfully with sautéed or steamed vegetables like bok choy, green beans, or carrots. For an inspired meal, accompany it with egg rolls or hot and sour soup as starters.
Storage, Freezing, and Reheating
Leftover honey garlic chicken can be stored in an airtight container in the refrigerator for up to four days. To reheat, use a microwave or consider warming it up on the stovetop to restore some of the texture. This dish can be frozen for 2-3 months as well; just make sure to store it in a freezer-safe bag. When ready to enjoy, simply defrost overnight in the fridge and reheat it as needed.
Frequently Asked Questions
Can I prepare honey garlic chicken ahead of time?
Yes, you can make honey garlic chicken ahead of time. It stores well in the refrigerator for up to four days, making it a great meal prep option.
What can I use in place of honey?
If you don’t have honey, light corn syrup or maple syrup can be used as substitutes, though the flavor will be slightly different.
Can I cook this recipe with boneless chicken thighs?
Absolutely! If you prefer boneless thighs, make sure to adjust the cooking time slightly, aiming for an internal temperature of 165°F.
Can this dish be made in an air fryer?
Yes, you can prepare honey garlic chicken in an air fryer. Just spray the basket with cooking spray, season the chicken, and air fry until cooked through, then mix it with the sauce afterward.
How do I know when the chicken is done cooking?
The best way to check chicken doneness is to use a digital cooking thermometer. Chicken should reach an internal temperature of 165°F to ensure it’s safely cooked.
Easy 20-min. Honey Garlic Chicken
Ingredients
- 4 skin-on bone-in chicken thighs
- 2 tsp vegetable oil or any neutral oil
- 1/2 tsp salt
- 1/4 tsp black pepper
- 3/4 tsp garlic powder
- 5 cloves garlic minced
- 1/4 cup honey or light corn syrup
- 3 tbsp water cold
- 1 tbsp rice vinegar or apple cider vinegar / white vinegar
- 1/2 tbsp regular soy sauce or light soy sauce
- 2 tsp sesame oil toasted kind
- 1 tsp cornstarch or potato starch / tapioca starch (not shown in recipe video)
Instructions
- Debone the chicken thighs by placing them bone-side up on a cutting board. Then locate the bone and make small slits around the bone with a sharp knife until you’re able to easily remove it.
- Pat the chicken thighs dry on both sides with paper towels to remove any excess moisture.
- Season the chicken thighs on both sides with salt, black pepper, and garlic powder. Set aside.
- In a small bowl, combine the honey garlic sauce ingredients as listed above, until the honey has dissolved, then set aside.
- Heat vegetable oil in a large pan on medium heat. Once hot, place the chicken skin-side down and cook until the skin is golden brown, about 4-5 minutes. Flip and cook the other side for 2 minutes, or until the meat is cooked through and reaches an internal temperature of 165°F.
- Reduce to low-medium heat and add the sauce around the chicken thighs, allowing the sauce to thicken. Flip the chicken so it’s skin-side down for 15 seconds, to let the skin absorb some of the sauce, then flip again.
- Garnish with green onions. Enjoy as is or transfer to a cutting board and slice into smaller pieces.
